Can You Install Shiplap Over Popcorn Ceiling? Cost + How to Install
Shiplap is a construction material used commonly as exterior siding in the construction of homes, sheds, barns, and other structures. It’s a type of wooden board with a groove cut on opposite sides of each edge to allow the two pieces to fit together perfectly. When you want to get rid of a popcorn ceiling, you may want to consider shiplap planks as a way of covering it up. But is it a good, practical idea?
You can install shiplap over a popcorn ceiling to cover it up. Shiplap planks come in a variety of sizes and can be attached to the ceiling with nails. Simply measure the popcorn ceiling and locate the joists above it, then cut the shiplap boards to size and attach them to the joists with 2-inch finish nails.
Shiplap is commonly used for exterior sliding – usually comprising of either milled pine of around 19 mm in thickness or rough-sawn pine of around 25 millimeters thickness. Lately, shiplap has become a popular option for interior design – mainly for walls instead of drywall due to its subtle texture, rustic charm, and aesthetics.
Can You Use Shiplap to Cover Popcorn Ceiling?

Yes. You can use shiplap to conceal the popcorn ceiling. If your popcorn ceiling has imperfections and you don’t want to go through the expenses or mess of removing it, covering them with Shiplap planks will upgrade your room. Installing Shiplap planks on a popcorn ceiling is not only amazing but can also elevate your interior space.
How to Install Shiplap Over Popcorn Ceiling
Before I explain the steps involved, I’ll first highlight the tools and supplies you will need to install shiplap boards over the popcorn ceiling. First, you will need to purchase planks of shiplap. To figure out how many Shiplap planks you’ll need, measure the size of the room by multiplying its length and width and then dividing the surface area of a single shiplap plank.
When it comes to tools, you will need a miter saw, measuring tape, finish nail gun, 2-inch finish nails, stud finder, ladder or step stool, Multi-tool, Hole cutter, Caulk, Spackling, Putty knife, Sanding block, Ceiling paint, Paint tray, Paint roller and Paint roller cover.
Follow these steps below to install shiplap over a popcorn ceiling:
Step 1. Remove everything from the ceiling
The first thing you need to do is to remove fixtures from the ceiling. This includes air vents, chandeliers, lights, and remove anything you have hanged in your ceiling.
Step 2. Mark the ceiling joists
Use an accurate stud finder to locate and mark the ceiling joists. Ceiling joists are pieces of timbers or sheets of plywood right above the ceiling that provide support to the ceiling materials and connect the outside walls. In this project, they will act as a platform to mount shiplap planks.
Step 3. Cut and attach the shiplap planks
Once the joists are marked, the next step is to cut and attach the shiplap planks. Use a miter saw to size the shiplap planks. Add the first ship plank to the ceiling and make sure it is lined up correctly to the wall.
Hold the finish nail gun at a 45-degree angle when nailing the shiplap plank over the popcorn ceiling’s original joists. This will straighten the enforcements above and prevent the ship planks from shifting against the other planks.
Using the nail gun, drive the 2-inch nails into the edge of each plank along the tongue. If you want to make room for fixtures such as chandeliers or air vents, attach a shiplap plank to the popcorn ceiling next to the fixture’s hole and then mark the space that will be needed. Use multi-tool for the straight cuts and a hole cutter for the circular cuts.
Step 4. Caulking and spackling
Once the shiplap planks are fixed, now it’s time to caulk and spackle. Caulking and spackling is a form of painting intended to fill gaps and holes with caulk coating and spackle compound. Whereas spackle is a non-water-resistant compound that dries hard, caulk is a type of coating that resists moisture.
First, apply caulk coating in a small bead along the edges of the room using a caulking gun. Use your fingers to smooth the coating to create a seal between the ceiling planks and walls. If you want to prevent the coat from messing with your wall, fix painter’s tape to the wall.
The nail holes will be visible on the surface of the shiplap ceiling. Spackle them with a putty knife and then use your finger or another medium to smooth.
5. Paint the shiplap ceiling
You need to paint your shiplap planks using ceiling paint. Start by rolling the ceiling paint in the same direction as the shiplap plank. Replace your fixtures and air vents after the painting is done.
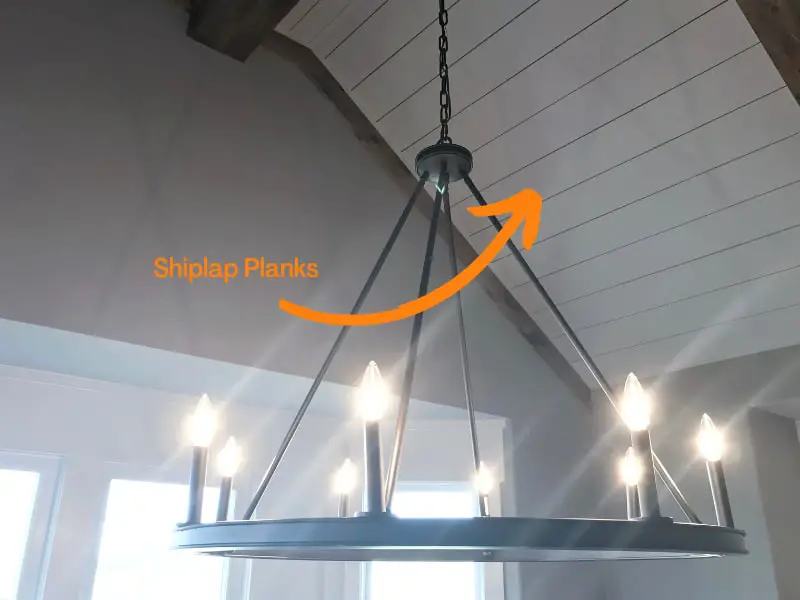
Here’s an example of a finished project:
Cost of Putting Shiplap on Popcorn Ceiling
The cost of covering a popcorn ceiling with shiplap varies depending on many factors such as the type of shiplap used, the size of the room, and whether the work will be completed by yourself or a professional contractor.
Shiplap is cheaper compared to other siding materials like Dryvit. The cost of shiplap wood panels plus installation ranges anywhere from $2.50 to $7 per square foot. On average, it will cost you between $1,200 and $1,700 to cover a single room.
If you want to use Shiplap Peel and Stick Fabric instead of Shiplap panels, the cost is approximately $3.50 per square foot. This is a cost-effective option if you are on a budget.
Advantages of Shiplap Ceiling Over Popcorn Ceiling
1. Easy to install
Shiplap Peel and Stick fabric wallpapers and Shiplap panels are easy to install compared to other methods of covering popcorn ceilings. As stated earlier, the wooden boards have a groove cut on opposite sides of each edge making them easier to overlap intuitively on top of the other.
2. Good visual impression
Another reason you need to consider covering your popcorn ceiling with shiplap is because of its beautiful natural appearance. The wooden boards are just from beautiful woods like cedar, oak, or pine. The natural wood interiors give a home more warmth and a charming feeling.
3. Make a room feel taller
Covering your popcorn ceiling with Shiplap panels makes your room feel tall. This is because the lines made by shiplap panels draw your eyes from the floor up to the ceiling, giving the illusion of additional height.
4. Adds timeless character
Another advantage of the shiplap ceiling over the popcorn ceiling is that it adds timeless character to blank ceilings through clean lines, color, and texture. However, to achieve this ageless character in your room, you need to choose a shiplap style that complements your interior style.
5. Shiplap is less mess
Scraping a popcorn ceiling or removing it completely is a messy task. It will litter your furniture with plenty of tarps, pesky paint dust, and drop cloths. You can avoid all these by simply installing Shiplap boards over the popcorn ceiling. Keep in mind that old popcorn ceilings are known to have asbestos – which is toxic to humans.
In fact, installing Shiplap boards can be completed in a day whereas scrapping popcorn ceilings requires multiple sessions.
6. Shiplap works with all styles
Lastly, putting Shiplap over the popcorn ceiling works with almost every interior design. It can work with mid-century modern, industrial, Scandinavian, nautical, farmhouse, urban modern, and even traditional interior design styles. You can also use it in a lot of different style homes.
Installing shiplap planks over the popcorn ceiling is a project you can do yourself. If you don’t have time or want the project to be done professionally, you consider hiring a professional contractor.
See also other ways to cover a popcorn ceiling here if you don’t want to scrape it off.
Pro tip: You can also try shiplap as a kitchen backsplash or bathroom ceiling.
MORE ABOUT CEILINGS
- Why is There a Cracking Noise in My Ceiling
- What is The Thickness of Ceiling Drywall?
- Why Popcorn Ceilings Crack (With Fixes)
- Signs of Water Damage on Popcorn Ceilings
- Putting Wood Planks Over Popcorn Ceilings
- Laying Drywall Over Popcorn Ceiling
- Great Alternatives to Popcorn Ceilings